Simple, High-Performance, FREE
All you need for Remote Amateur Radio
Learn How

Card image cap
The Simple Internet Remote Story
Remote Desktop + High Performance Mumble Audio

Amateur Radio remote operation over the internet has become very popular. There are many commercial products to support remote, including some IP-based radios. That said, many of these techniques for remote are complex, and generally, somewhat expensive. There must be another way.

Over the past 6 years, W1VE and friends have developed a technique for remote operating over the internet. It's been proven over and over again. It was part of AA7JV's RIB DXpedition Operations -- VP6A, E51D and N5J, for example, where tens of thousands of CW QSOs were made by remote operators from around the world. It has been used for very successful remote contest operations, such as W1VE@K2LE/1, VE4CDX@VE4YH, VE9XDX@VE9XX, VY1AAA@VY1JA, ZF2VE@ZF5T, and 7Q2T@7Q6M.

This remote technique can be used for any type of operation: casual conversation, DXing from a better QTH, Contesting everywhere and anywhere, or simply for the challenge of doing it. We have ubiquitous internet these days, and now hams can use it to their advantage! As long as your radio supports CAT Control, it doesn't matter the age of the radio, this will work.

If you have DSL, Cable, FTTH, 4GLTE or Starlink Satellite, you CAN remote your station with FREE software, and the process is simple. If you are in an HOA, a bad radio location, want to contest from a different location, or just want to be able to remote your station 'because', this technique has proven technology, and overcomes issues in many commercial remote applications, especially from vendors. More on this subject later


It will take a while to absorb this page. There is a lot of detail. However, it's worth a read!
If you are generally familiar with this internet remote technique, you can jump to the How-To.

There are two important pieces of software you will require: First, a remote desktop client. I recommend Anydesk (free license), or the free software RustDesk. There are other remote desktop solutions, but both of these provide a rendezvous server, so that no matter how you connect to the internet, you can connect, even if you are behind a corporate firewall or a CGNATed service (4GLTE or Starlink). Stay away from a station-provided server, such as VNC, as you will not have to deal with VPNs, Port Forwarding, and Dynamic DNS.

The cool part about using a remote desktop, is you get all your station automation on the remote. If you have antenna switches, rotators, amplifiers, etc, on your main station, all that will be available on the remote desktop. For radio control, you can run your favorite Glass Desktop software, such as Win4XXX Suite, Ham Radio Deluxe, wfview, or simply a contest logger like N1MM+ or DXLog. You will need a PC or Raspberry Pi at your station with your automation apps installed.

What's the Catch?
This remote control technique can be used for SSB, CW, RTTY and Digital modes. For CW enthusiasts, it supports CW through the logging program or remote control app -- paddle CW is another story. There are no great easy solutions to do this -- if you know one, contact me -- gerry[at]remote.radio.

High Performance, Low-latency Audio
Many who try remote with a remote desktop application try and use the audio supplied over the remote desktop. This is a terrible solution. The issues we fight with a radio remote are internet latency (delays in the audio stream) and jitter (the instantaneous difference in latency changes). Remote Desktop audio just does not cut it. Thank God for on-line multi-player gamers. They invented an open-source Muti-User, multi-channel audio 
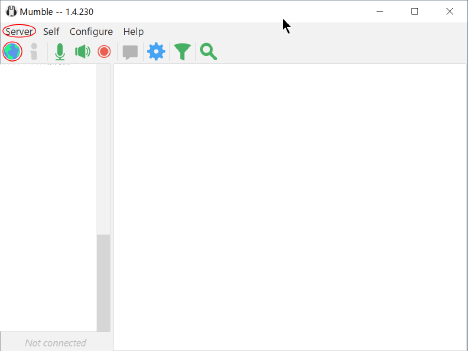
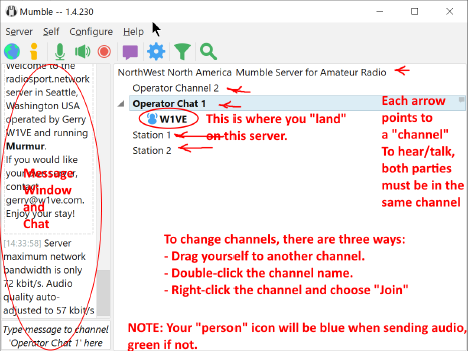
conferencing system called Mumble. It has been around quite a while, and, works very well under trying conditions (after all, you can literally be dead in an on-line game if your latency is too high!). Mumble 
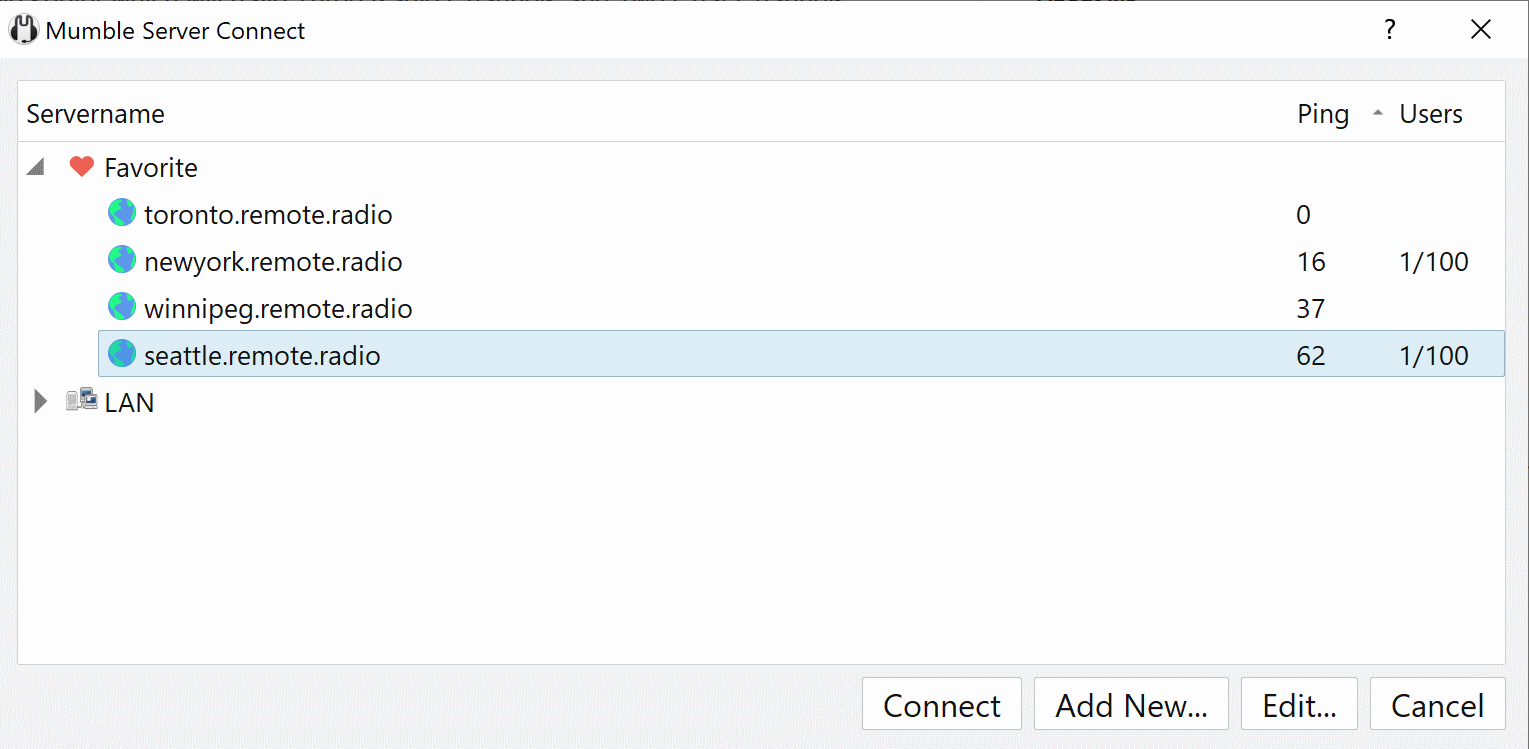
is a client/server model. The secret sauce with Mumble and Remote.Radio is we have servers around the world, which provide very low latency to users. The added benefit is these servers are on public ipV4 addresses, meaning no matter what internet ISP you have, you can reach the servers.

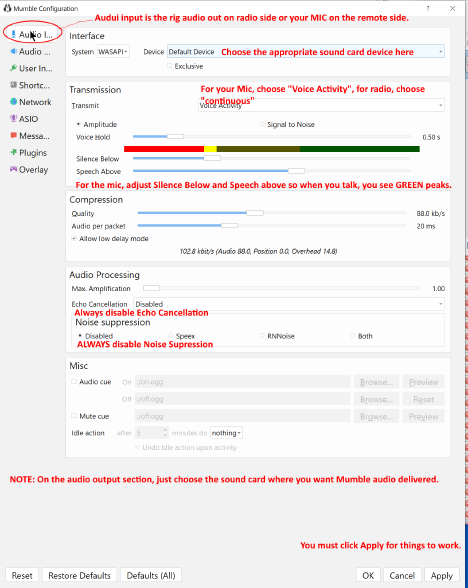
Both your station and the remote operators are clients of Mumble. Mumble connects to your radio via either a sound card within your radio, or, using a sound card on your PC. See how below.

Installing and Configuring the Mumble Audio Client

To download Mumble, go to Mumble Download and select the version of Mumble appropriate for your operating system. These directions apply to Windows. Follow along -- the steps are almost identical on other operating systems.
You'll need to install Mumble on a PC (or Raspberry Pi) at the station, and on your remote operating position (such as a laptop).
After you install the client, run it. If it fails to start on Windows, you need to get a C++ runtime. Download VC++ Runtime for x64 or the appropriate version for your Operating system.
When you first start Mumble, it automatically runs a bunch of Wizards. You should cancel out of ALL of them. Why? One reason is it will fill your server list with 1000 servers you will never use! Another being it is a waste of your time to configure Audio until later in the process. Once you have canceled out of the Wizards, go to the Configure->Settings menu and select Network. Then, check the box that says "Hide Public Server List". You'll thank me for this later.
Specifying a Server
Next, you need to connect and specify the Mumble Server details. At the top of Mumble are menus and Icons. Click the World Icon, or click the 'Servers' menu.


Card image cap

Once you click the button, you will be presented with a server-selection dialog:


Normally, this dialog should be empty if no servers had been specified before. However, some of the Public remote.radio servers are shown. Note the data on the right-hand side. If you see a ping value, this means the server is active on the port you have specified, and this is the ping time to the server (shorter is better). If no ping is shown, you will not be able to connect. Next to that is a count of the users. The first number is the active users, and the second number is the capacity of the server (Number of connections supported).
Adding a Server


To add a new server, in the Address field, put the Domain Name or IP Address of the server (for example, newyork.remote.radio). The Port field is very important. The default port for Mumble servers is 64738, which is the default shown. All remote.radio public servers are on this port. If you purchase a Private server, it will be on a different port. If you know your password is correct, and the server keeps rejecting you, it is probably because you have the wrong port. The user names must be unique for every user connected to a server. A common standard is the station-side connection might be 'W1VE-station', for example, and the remote operator client might be 'W1VE' (No quotes on either. No spaces are allowed.).
Mumble has a single password for a server. In addition, Mumble audio is TLS encrypted end-to-end. This requires a user to accept a self-signed certificate. Luckily, once you have entered a password and accepted the certificate, it will not ask you again.
Connecting


To connect to a server, highlight the entry in the server selection list, and click connect. Otherwise, double-click the server entry. if this is the first time you connect to a server with a unique user name, you will be prompted with a dialog like the above. It is very important that you choose YES to accept the certificate. You will then be prompted to enter the password:


The password for all remote.radio public servers is: Demo!
Once you are connected, you'll see the main Mumble Window. This diagram describes the parts.


The really important part here is to understand the Mumble has Channels. Any numbers of users can be in the same channel. Everyone will hear the audio. The station side is one user, the remote station is the other. Many remote stations can connect to same channel. The 'Operator Chat' channel is one channel, and "Station 1" is another. To move between channels, either double-click the channel name, or drag and drop yourself on a channel name. So, for normal remote operation, both the station client and the remote client need to be in the same channel.

Note Since you will be connecting to a remote-desktop session at your station, make sure you don't confuse your Mumble there with your Mumble at the remote side.

Connecting Audio


Connecting audio in Mumble is pretty straightforward. That said, there are some specific issues with some radios. See the Radio Recipes section for detail on specific radios. In the above dialog, we are setting the transmission of audio setup. To get to this dialog, go to Configure Menu->Settings, and when the dialog shows up, you will be in the Audio input side.

For the Station Side
Choose the appropriate sound card input (radio USB or sound card input) in the top menu. Under Transmission, select 'Continuous' for Transmit. This, remember, is your receive audio. Then, DISABLE 'Echo Cancellation' and 'Noise Suppression'. If you do not do this the audio will sound terrible.
For the audio output from the radio, select the appropriate sound card in the Audio Output side.

For the Remote Side
Choose the appropriate sound card input (radio USB or sound card input) in the top menu. This is your microphone. Under Transmission, select 'Voice Activity' under Transmission. This, remember, is your transmit audio. Mumble is Digital audio, and has a very good soft VOX, Talk into your Microphone, and adjust the 'Silence Below' and speech above sliders so that when you speak, the multi-colored VU Meter shows green. If you don't have enough audio, or too much audio, adjust the Microphone level in your PC Audio Control Panel. Then, DISABLE 'Echo Cancellation' and 'Noise Suppression'. If you do not do this the audio will sound terrible.

Note: Your radio must support VOX on it's audio input (be it Mic or USB Audio). It is the nature of this integration. Mumble's VOX is very good, especially with a headset. If you do not like VOX, Mumble does support a PTT function. Under Transmission, select Push to Talk. This will bring up a new Mumble window with a PTT button. This can be cumbersome, but Mumble supports Shortcuts. You can assign a keyboard key to do PTT. This is under Shortcuts in the Settings menu. A Keyboard Shortcut can also be cumbersome. I found a need trick to implement a foot-switch. Amazon sells an inexpensive foot switch that will send keyboard macros. Its $15.99 (1/2025) Buy here.

About Audio Connections
Mumble just needs connection to your sound card. Many modern radios have built-in sound cards, making the connection process easy. Typically these connections are called 'USB Audio'. Beware that if you turn off the radio, the audio ports will disappear, and if you turn on the radio, you will have to establish the connection again. For many of us who have older radios, there is way to connect simply, using the Speaker, Line Out or Headphone jacks for receive audio, and the Line In or Microphone In for transmit audio on SSB. You use a PC sound card. You MUST isolate the PC from the radio. This can be done with inexpensive audio isolation transformers. Amazon happens to sell ones with 3.5mm jacks -- perfect for the purpose.

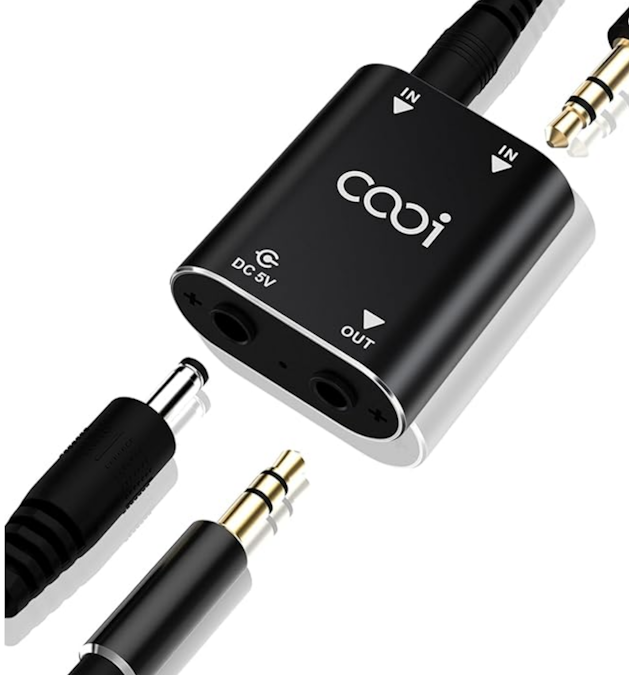
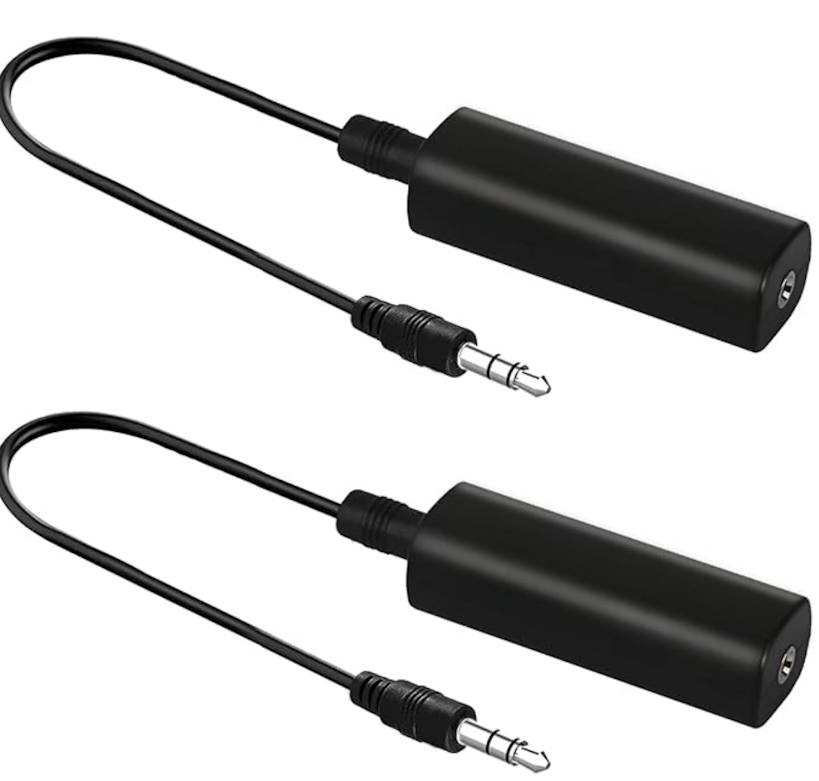
$9.99 on Amazon (1/20205) Buy

In addition, you may want to add another sound card to your PC, or add one if not present. Here's what I use:

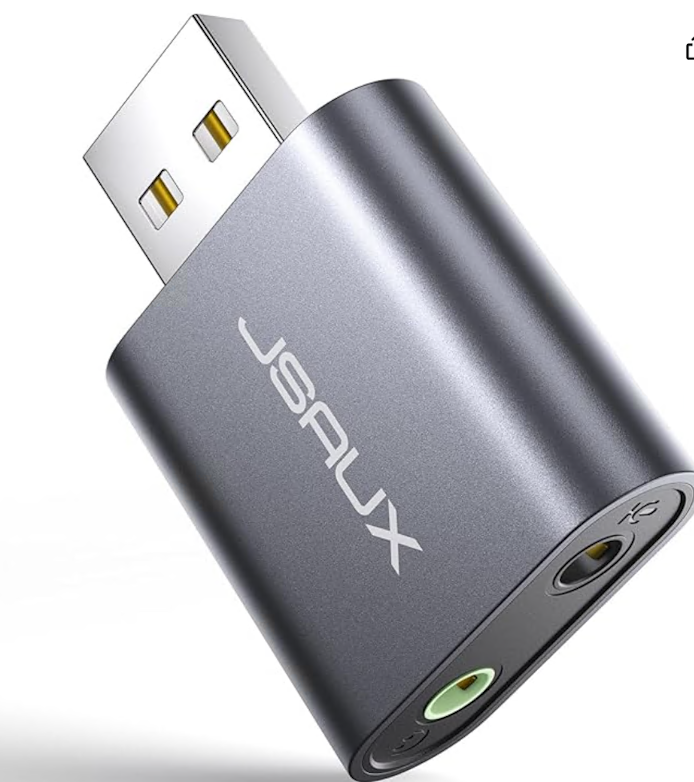
$7.99 on Amazon (1/20205)
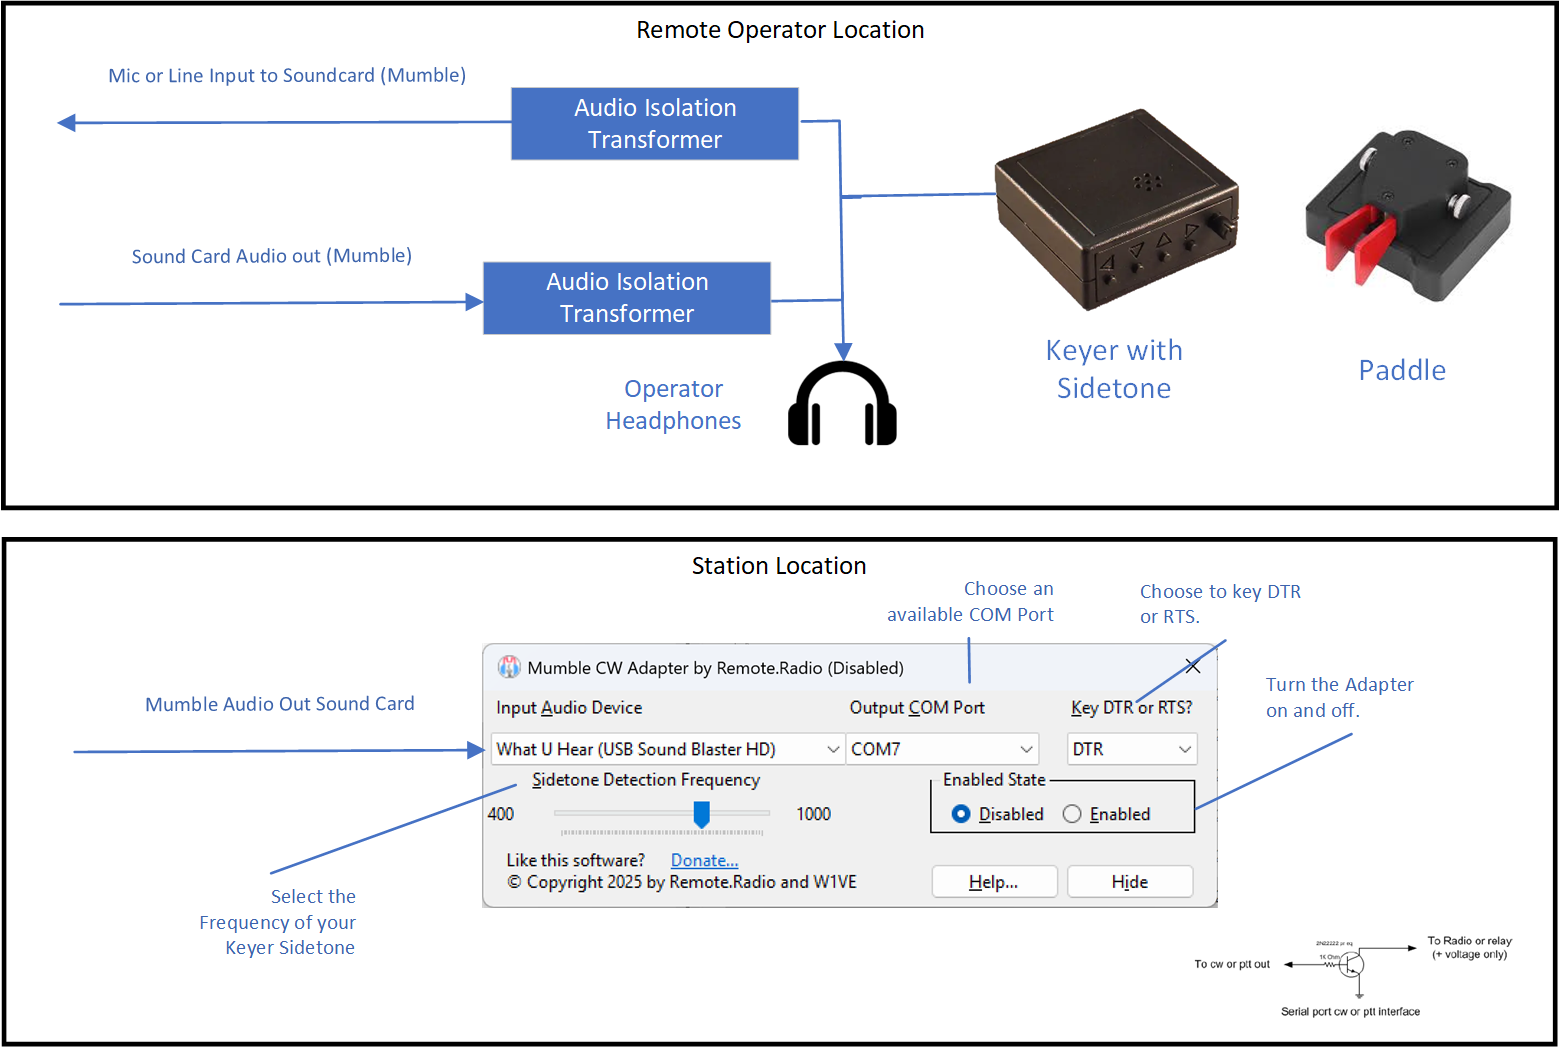
 Buy

There is no need for a super high power sound card. So, the connections go this way for radios that don't have a built-in sound card': Audio output from radio to the 3.5mm isolation transformer, from the transformer to the input of the sound card. This is receive audio. For transmission, the line out or speaker out of the sound card goes to another 3.5mm isolation transformer, and to the line in or microphone in on your radio. Of course, you'll have to carefully adjust levels to not overdrive the radio.

About Our Public Mumble Servers

Remote.radio is the brainchild of Gerry, W1VE. He has set up 14 public, free Mumble Servers around the world for use by Amateur Radio Operators. Each server includes a tool to allow you to test the latency and jitter to the server. Below is a list of the current mumble servers. This list may change over time. If you click on the link, you'll be taken to the OpenSpeedTest application on the server. Check which one works best for you.

CW Remote QSOs will tolerate very high latency. Of course, CW using this Mumble+RDP solution is keyboard CW only, and you listen to sidetone generated at the station. If you are operating between two points in the same country, use the server with the lowest latency between station and remote. Thousands of QSOs have been made with latencies > 250 ms. The only issue is the "slag" when tuning quickly. with higher latency, you will still bust pileups and have high rates!

For SSB operation, the latency should be < 125 mS. There are some options to do SSB over a high-latency connection, which I will discuss in a future page. It's generally not fun, but can be successful over a 250ms connection.

That said, for users in North America and Europe, you should be able to find a server with less than 50mS latency from your locations.

newyork.remote.radio -- New York, NY USA
washdc.remote.radio -- Washington, DC USA
dc.remote.radio -- Washington, DC USA (server 2)
tampa.remote.radio -- Tampa, FL USA
phoenix.remote.radio -- Phoenix, AZ USA
seattle.remote radio -- Seattle, WA USA
toronto.remote.radio -- Toronto, ON Canada
winnipeg.remote.radio -- Winnipeg, MB Canada
london.remote.radio -- London, UK
london2.remote.radio -- London, UK (server 2) frankfurt.remote.radio -- Frankfurt, Germany
israel.remote.radio -- Tel Aviv, Israel
7q.remote.radio -- Johannesburg, South Africa
singapore.remote.radio -- Singapore

Current Status page for all servers

Private Servers
Private Mumble Servers for Amateur Radio

Some Amateurs, especially contesters and DXers, would like to have a Mumble Server dedicated for their operations. Therefore, remote.radio is offering a private Mumble Server subscription. For $10/year, you will receive a subscription for a Mumble server at the location you choose. Included is a DNS name in the form of [call-sign].remote.radio.

Radio Recipes
How to Interconnect various radios with Automation and Audio

To operate successfully, you need some type of glass desktop automation to control the radio: RX/TX, frequency control, etc. The minimum control you need for this is a general application like HRD, N1MM+Logger or DXLog. These will allow you to control the radio (though AC or DC power control is a different story), Many of these manufacturers have remote offerings of their own. Most of them are complex to install, and some of them don't support all modes. This list relates to operating with Mumble and Remote Desktop.

The comments below are that of the author, and are from direct experience with all of these radios. YMMV

Here are some popular HF radio manufacturers and model differences:

  1. Kenwood
    Older Kenwood Radios, starting with the TS-930 and TS-940 have CAT Control. Audio can be routed using a sound card.
    The TS-480, TS-2000, TS-590S/SG and more modern radios have free glass-desktop control programs, generally with the name ARCP-[version] (Amateur Radio Control Program). A version of this software is available on the Kenwood site. These radios have excellent support for remote control -- you can power the radio on and off from the software; these radios have USB for Audio and CAT, and most importantly, for SSB operation, they support VOX over the USB audio connection.
  2. Elecraft
    From the KX3 to the K3/K3s and on to the K4, Elecraft radios are equipped to do remote. Depending on the radio and version, CAT is either USB or RS-232; on the K3s and K4, you have digital audio with a built-in sound card.

    The Elecraft product line has a great glass-desktop control program written by a third party, called Win4K4Suite by VE2FSQ. It works with all the radios which can be remotely controlled. It is commercial software, but it is quite inexpensive.

    Elecraft radios with USB have full support for VOX over both Line In and USB Audio.
  3. Icom
    Many older radios support CAT Control and audio can be routed from a sound card. For modern Icom radios, such as the 7300, 7610, 7800, etc, these radios support CAT and Audio over USB. The one flaw in the ointment is these radios do not support VOX over USB Audio. This means for Mumble+RDP SSB use, you must use a sound card, transformers and cabling.

    The Icom product line has a great glass-desktop control program written by a third party, called Win4IcomSuite by VE2FSQ. It works with all the radios which can be remotely controlled. It is commercial software, but it is quite inexpensive.

  4. Yaesu
    Many older radios support CAT Control and audio can be routed from a sound card. For many modern Yaesu radios, such as the FTDX10, FTDX101D/DX,FT-991 and others in this class, these radios support CAT and Audio over USB. The one flaw in the ointment is these radios do not support VOX over USB Audio. Nor do they support sidetone over USB Audio. This means for Mumble use, you must use a sound card, transformers and cabling to make Mumble+RDP remote work on SSB. Doing so, you will fully support VOX on Remote, plus have sidetone for CW.

    The Yaesu FTDX Series and FT-991 have a great glass-desktop control program written by a third party, called Win4YaesuSuite by VE2FSQ. It works with all the radios which can be remotely controlled. It is commercial software, but it is quite inexpensive.

  5. Flex
    Modern Flex radios are designed as IP radios, and the radio interface is actually a PC program. That said, though much experience, using Mumble and a Remote Desktop Client has been battle-tested with many 10s of thousands of QSOs made that way. The Flex client runs on the desktop where the radio is located: there is no need for IP connectivity. Doing it this way offers optimal performance of the Flex UI. Audio is another challenge. Flex has been plagued with latency-over-time issues with DAX -- according to recent reports this has been fixed. You can use Mumble with DAX if you use the DAX virtual audio channels for your audio source and sink. However, doing it this way, you have no sidetone on CW. The best way to do audio on the Flex is interface to the speaker or headphone output and the Mic input, feeding an audio card on your station PC via isolation transformers. You'll get beautiful audio and sidetone on CW. Also, using an external Mumble server provides instant backup should you have an internet failure -- switch from your home provider to your 4GLTE hotspot in seconds.

Remote Operating Software
Free Software to help with Remote Operation


Remote Paddle CW using Mumble only!

Once thought impossible, I've developed a solution. If you have a keyer in your remote location that can generate a sidetone, you feed this side tone into the Mic or Line Input of the Mumble client at the station. That side tone will be faithfully reproduced on the receiving end at the transmitter, only delayed by the latency.

There, you run my 'MumbleCWAdapter' application at the station location. In the application, you select the sound card that is receiving the Mumble audio. In addition, you select a COM port. The application will toggle the DTR or RTS lines of the comport. Then, you can use a transistor switch, or, if your rig has a dedicated COM port that you can use for DTR or RTS keying directly on the CAT interface.


The application uses a very, very fast audio sampler, bandpass filter and debouncer to detect the CW tone. It has an overall delay of 1 to 2 milliseconds. The code is tuned for CW speeds from 10 to 40 wpm.

The application is a single exe -- no need to install it. It runs on Windows 10, 11 and above. When you first run it, it will put an application icon on your desktop. You can run it out of any directory, including the Downloads directory. The application is not "signed". When you first download it, right-click on it, select "Properties", and check the check box labeled "Unblock".
Download MumbleCWAdapter here.

Please send any feedback to gerry[at]remote.radio. Enjoy!

Making the Sidetone Connection Easy on the Remote Side
Building cables for all this is a hassle. You need to listen to your sidetone locally, plus the receiver audio. To properly do this, you need a mixer! I've found such a perfect one, which will work with your laptop, and is tiny.

You can buy in on Amazon here. It is $23.99 (2/2025). It is perfect, because it uses 3.5mm cables, and takes 5v power (USB). Connect the sidetone output from your keyer to a Y cable -- one side feeding the Isolation Transformer, which then goes to the sound card input for Mumble. The other side of the Y cable goes to one input of the mixer. The other input of the mixer goes to the sound card Mumble output. Plug your headphones into the output and go!

In the works
Wouldn't it be great if you could just bring your paddle and your laptop for remote operation? I am working on a project that will make that happen. It uses a $10 tiny USB Dongle called the Adafruit TRRS Trinkey.

.

The Trinkey has four inputs on it's TRRS 3.5mm jack. Perfect for your key paddles or straight key. The concept here is to program the dongle with the K3NG keyer code, and have a sister PC application that will generate a sidetone from the keyer. This audio would feed your Mumble audio input. Parts ordered. Anyone out there want to help with the Arduino part? Email me gerry[at]remote[dot].radio. More information soon...

Adventures in Remote Operating
A blog of ongoing remote operations


My Crazy Amateur Radio Life

There is always something new to discover in Amateur Radio.

...

Gerry Hull, W1VE VE1RM VY1AAA ZF2VE 7Q2T

gerry[at]remote.radio

Owner